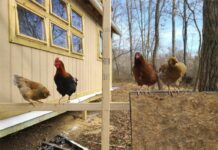
If you’re thinking about raising chickens on your property, one of the first things you’ll need to do is build a chicken pen. A chicken pen provides a safe and secure environment for your feathered friends to live and lay eggs. But building a chicken pen doesn’t have to be a daunting task. With the right materials and a bit of know-how, you can easily create a DIY chicken pen that meets all of your needs.
In this step-by-step guide, we’ll walk you through the process of building a DIY chicken pen. Whether you’re a seasoned DIY enthusiast or a beginner, this guide will provide you with all the information you need to create a comfortable and functional home for your chickens.
Materials Needed
Before you begin building your chicken pen, you’ll need to gather the necessary materials. Here’s a list of what you’ll need:
– Fencing material (such as chicken wire or hardware cloth)
– Wooden posts
– Hinges and latches for the gate
– Nails and screws
– Hammer and screwdriver
– Level
– Measuring tape
– Saw
– Gloves
– Respirator mask (for working with treated wood)
Step 1: Plan the Layout
The first step in building a DIY chicken pen is to plan the layout. Consider the size of your property and the number of chickens you plan to raise. A good rule of thumb is to allow 4 square feet of space per chicken in the pen, and 10 square feet per chicken in the run.
Once you’ve determined the size of your pen, mark the area where you want it to be located. Use a measuring tape to ensure the area is square and level. This will make it easier to install the fence and make your pen look more professional.
Step 2: Install the Posts
Next, you’ll need to install the posts for your chicken pen. Wooden posts are a popular choice for chicken pens, as they are sturdy and can easily be driven into the ground. Use a post hole digger to create holes for the posts, and then insert the posts into the holes. Use a level to ensure the posts are straight and secure.
Step 3: Install the Fence
Once the posts are in place, it’s time to install the fencing material. Chicken wire or hardware cloth are both good options for creating a secure enclosure for your chickens. Use a staple gun to attach the fencing material to the wooden posts. Be sure to stretch the wire tightly and staple it securely to prevent any gaps where predators could enter.
Step 4: Build a Gate
Every chicken pen needs a gate for easy access. To build a gate, measure the opening of your pen and cut a piece of fencing material to fit. Add hinges to one side of the gate and secure a latch to the other side. Attach the gate to the posts and make sure it swings open and closed smoothly.
Step 5: Create a Roof
If you live in an area with predators or inclement weather, you may want to consider adding a roof to your chicken pen. A simple wooden frame covered with chicken wire or hardware cloth can provide protection from overhead threats. Use nails or screws to secure the roof to the top of the pen.
Step 6: Add a Floor
If you want to create a more secure environment for your chickens, consider adding a floor to the pen. This can be achieved by using hardware cloth to cover the ground inside the pen. This will prevent predators from digging underneath the fence and gaining access to your chickens.
Step 7: Provide Shelter
In addition to the pen, your chickens will also need a shelter where they can roost and lay eggs. A simple wooden coop can be constructed inside the pen to provide a safe and comfortable space for your chickens. Be sure to include nesting boxes and perches for your chickens to use.
Step 8: Add Food and Water Stations
Finally, don’t forget to add food and water stations to your chicken pen. These can be as simple as bowls or buckets that are attached to the fencing. Be sure to keep the food and water stations clean and replenished to keep your chickens healthy and happy.
Conclusion
Building a DIY chicken pen doesn’t have to be a complicated or expensive endeavor. With the right materials and a bit of planning, you can easily create a safe and comfortable home for your feathered friends. By following the steps outlined in this guide, you can build a DIY chicken pen that meets all of your needs and provides a secure environment for your chickens to thrive.
In addition to providing a safe space for your chickens, a well-built pen can also add value to your property and enhance your overall homesteading experience. So roll up your sleeves, gather your materials, and get ready to build a DIY chicken pen that you can be proud of.


